


Users Module
I. Filters
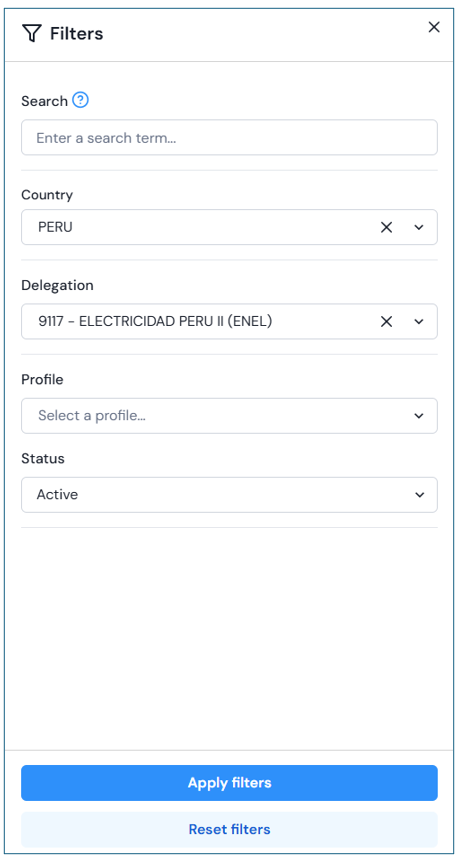
Upon entering this module, the homepage will be displayed with the filter open to perform the corresponding search.
The following options will be visible, although by default the country associated with the user will be shown:
-
Search
-
Country
-
Delegation
-
Creation Date (date range) (rango de fechas)

Click the “Apply Filter” button to obtain results according to the selected criteria.
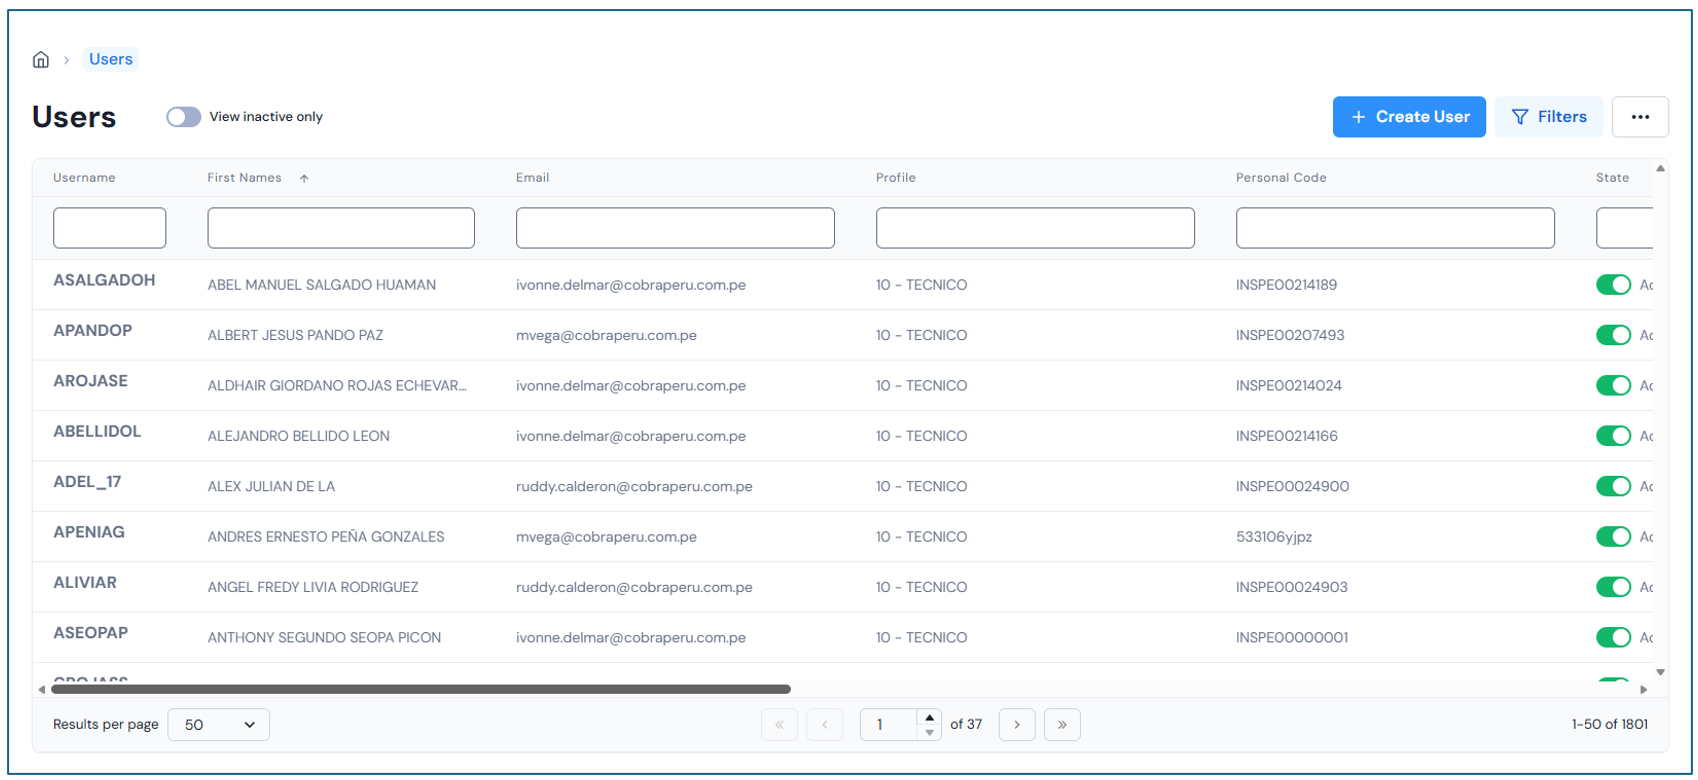
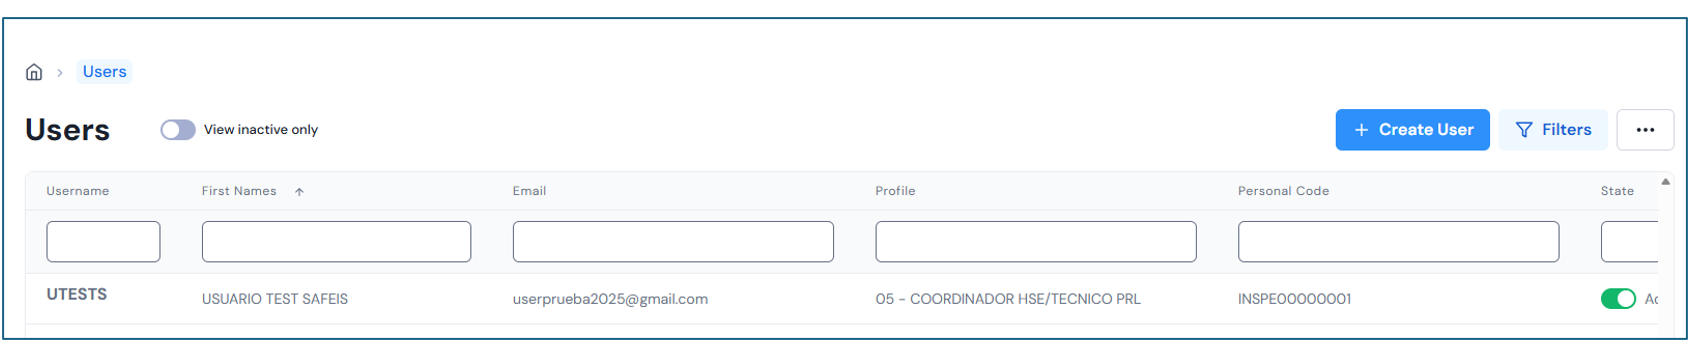
In the results panel, by default, all records both active and inactive will be displayed according to the selected criteria. From there, you can use the following functionalities:
-
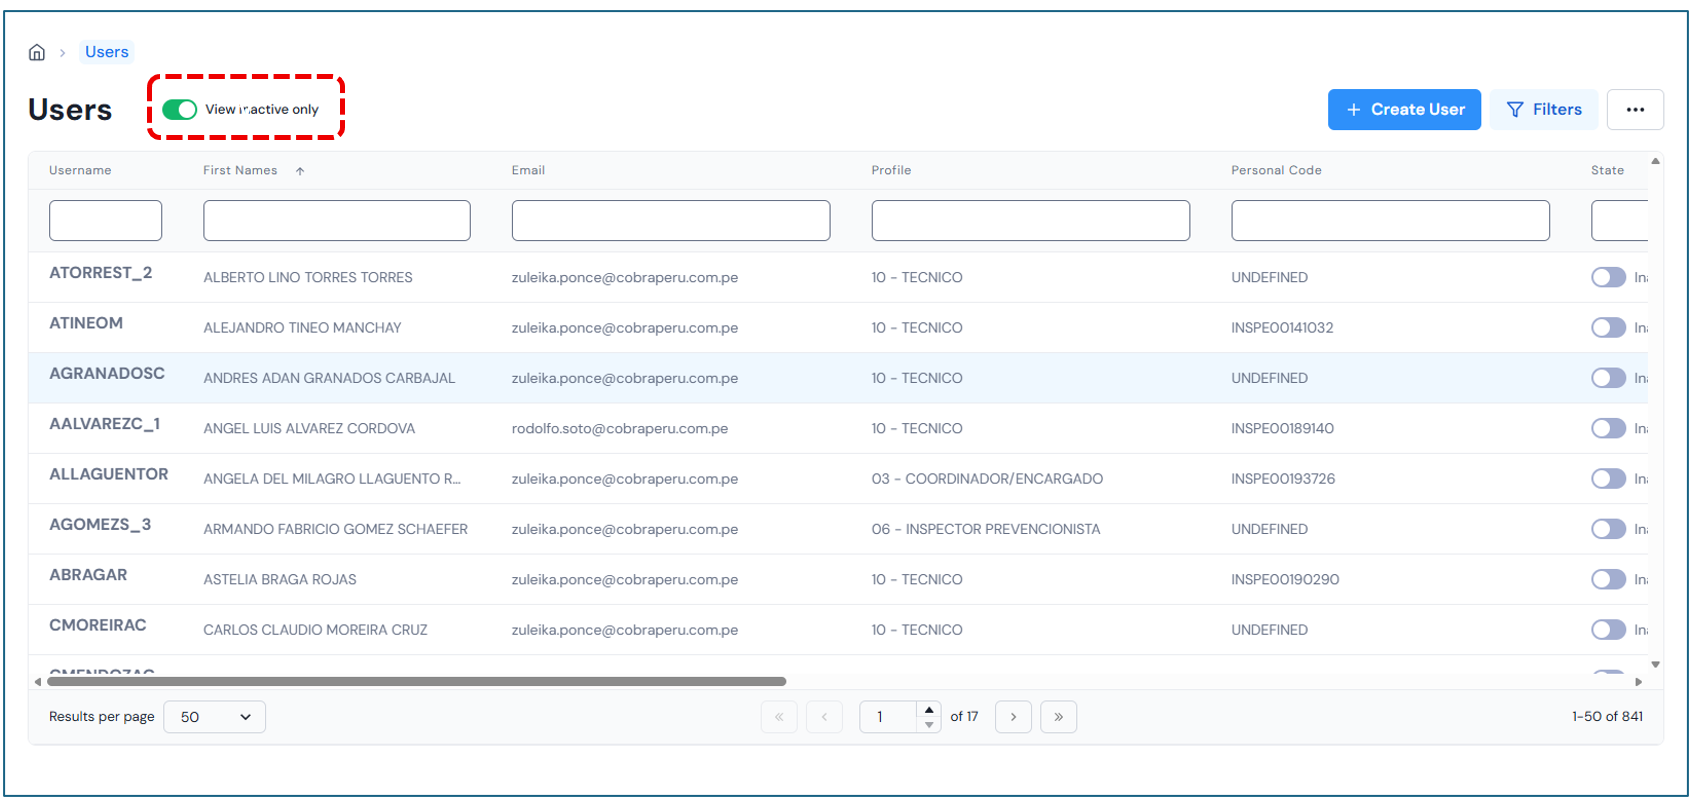
“View only inactive” button:Clicking this button will display only inactive records. To view active records again, click the same button once more.
Additional Filters At the top of the results panel, complete the available fields to obtain results according to the selected criteria while maintaining the initial filtering.
If you want to clear the previously filled filter fields, click the “Reset Filter” button to start a new search.
Records Within the results panel, you can view all records that meet the parameters of the selected filter. Additionally, you can perform a column-sensitive search to further refine the results.
Pagination At the bottom of the results panel, you can navigate between different pages to view more records.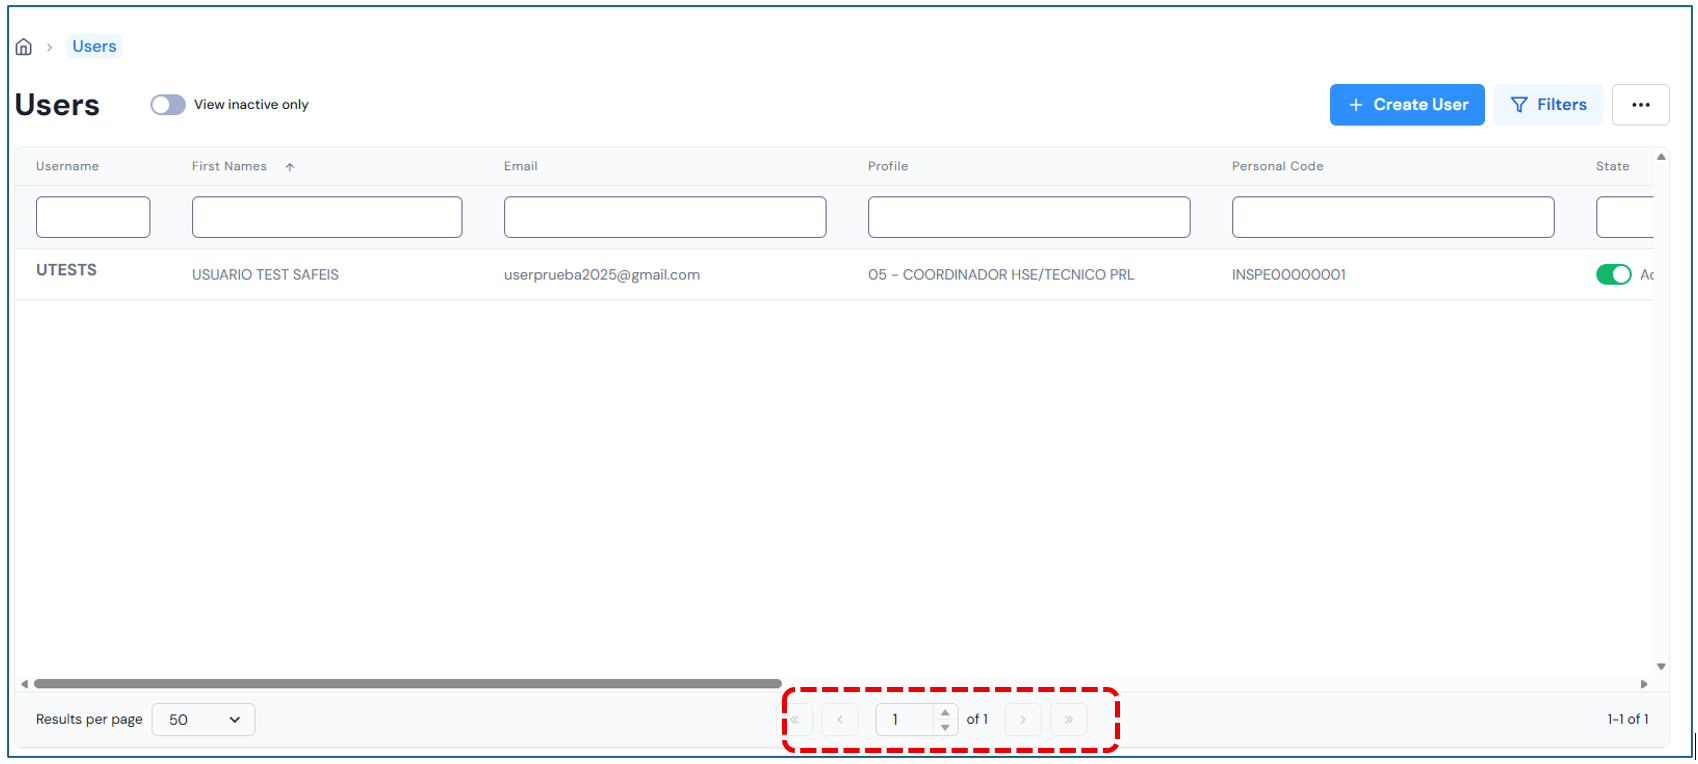
II. Create User
On the main page of the module, you will find the “Create User”button. Click this button to start a new record. A pop-up window will open where you can begin the process. Complete the following fields:
User Data
-
Identification Number: Entering this data will automatically fill in the Full Name..
-
OT: Entering this data will automatically fill in the Group, Country and Delegation.
-
Company
-
Profile

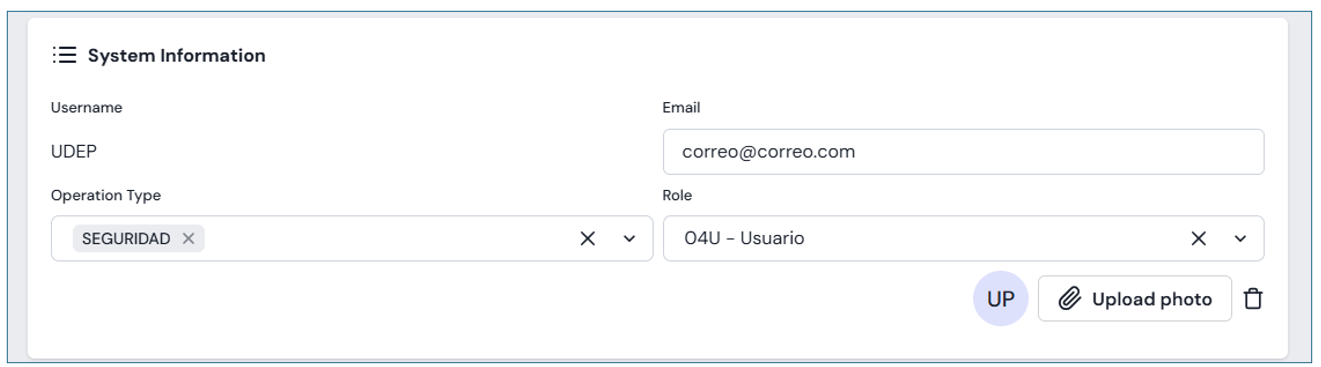
System Information
-
Email:
-
Operation Type: You can select one or more options.
-
Role
-
Upload Photo: Allows attaching the user’s photo.
Once all fields are completed, click the “Step 1 of 3” button..
Next, the Profile Type will be displayed, and by default, a list of associated accesses will appear. You can validate these accesses or uncheck those you want to remove.
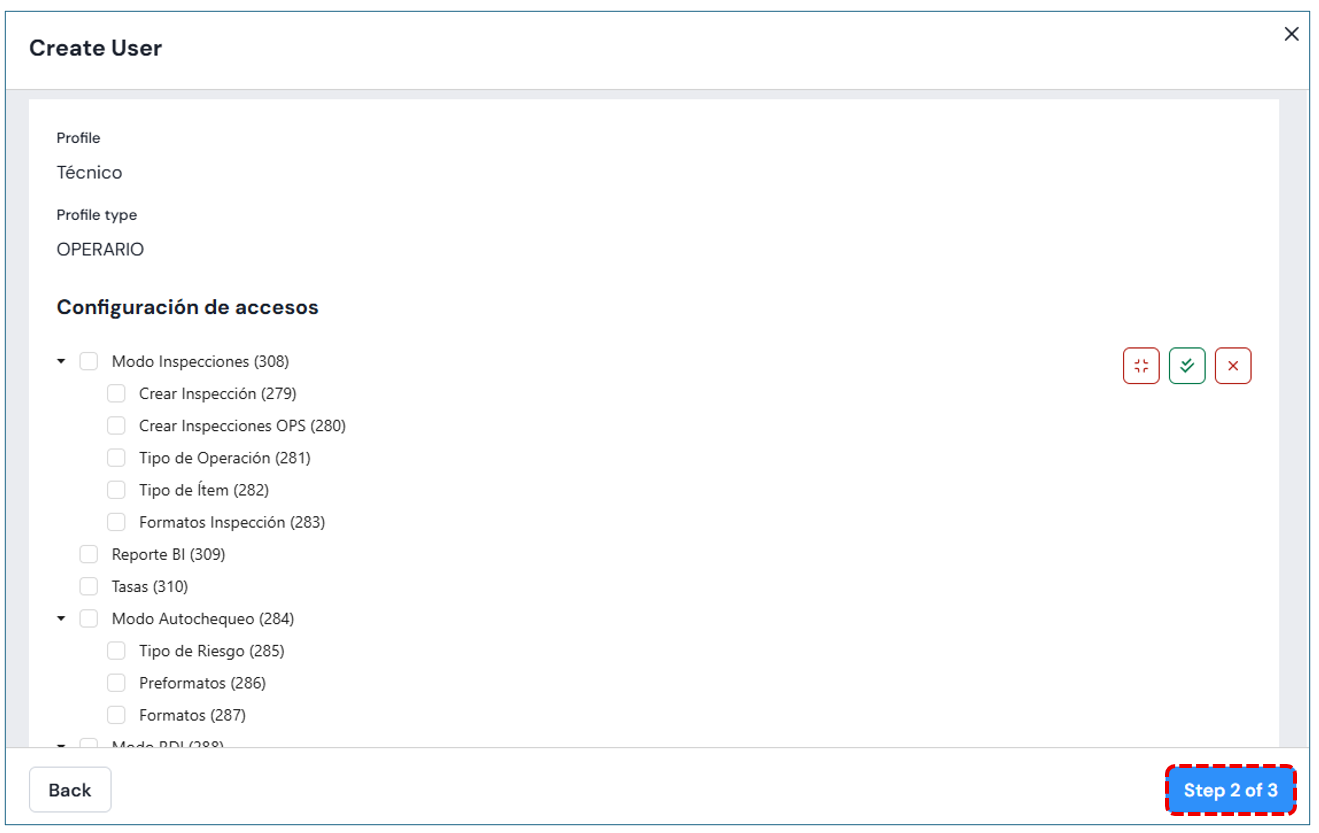
Clicking the “Step 2 of 3”button requires entering the permissions Group, Country and Delegation.
If you decide not to continue with the registration process, you can click the “Cancel”button located at the bottom left of the window, or close the window by clicking the (x) icon..
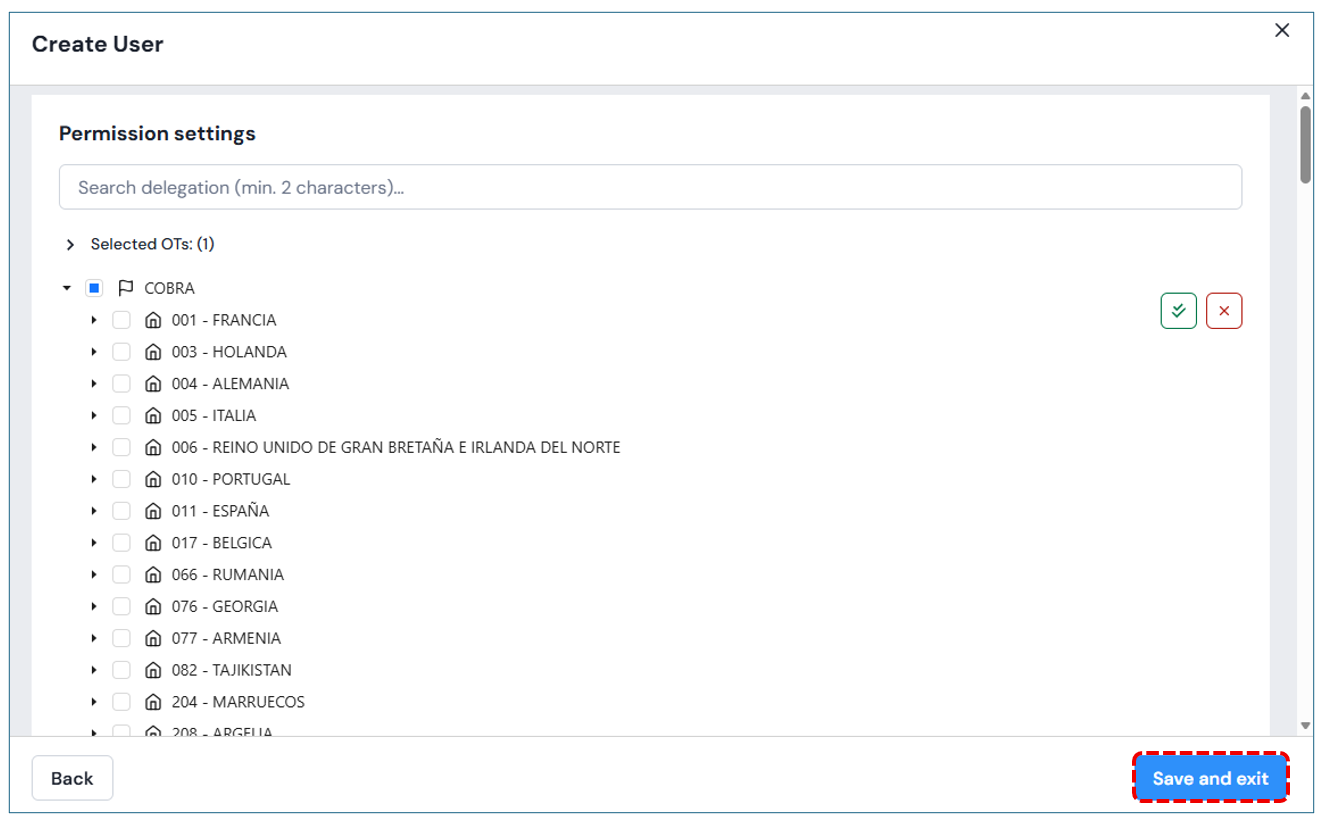
Finally, to save the changes, press the button. “Save and Exit”.
Edit User
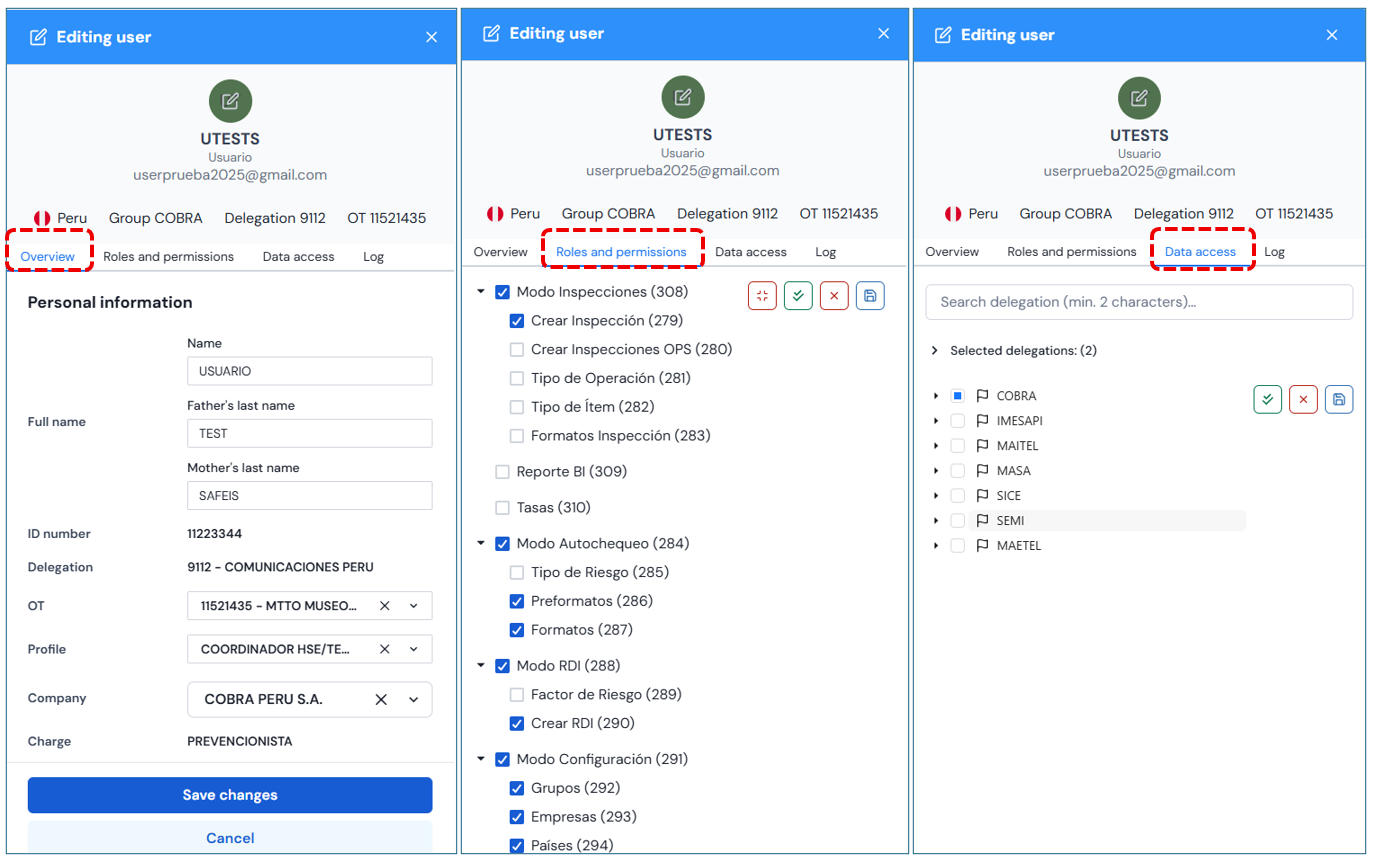
Within the results panel, clicking on the record you want to edit will open a left-hand side window showing the information of the already created user.
You can modify data in the three available sections, including the photo:
-
General Data
-
Roles and Permissions
-
Data Access
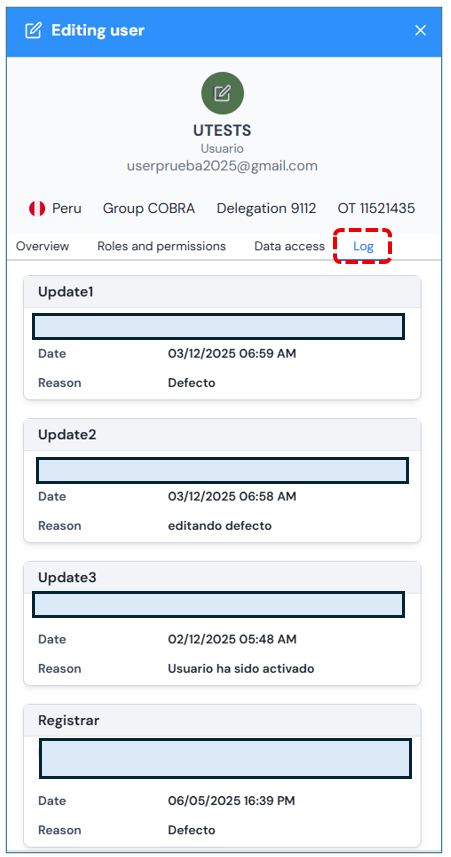
Additionally, a Historysection will be displayed, which is not editable. This section shows information about changes or actions performed on the user.
In the upper right corner, you will find additional options: Delete User and Reset Password.
If Reset Passwordis selected, the system will request confirmation before performing the action.
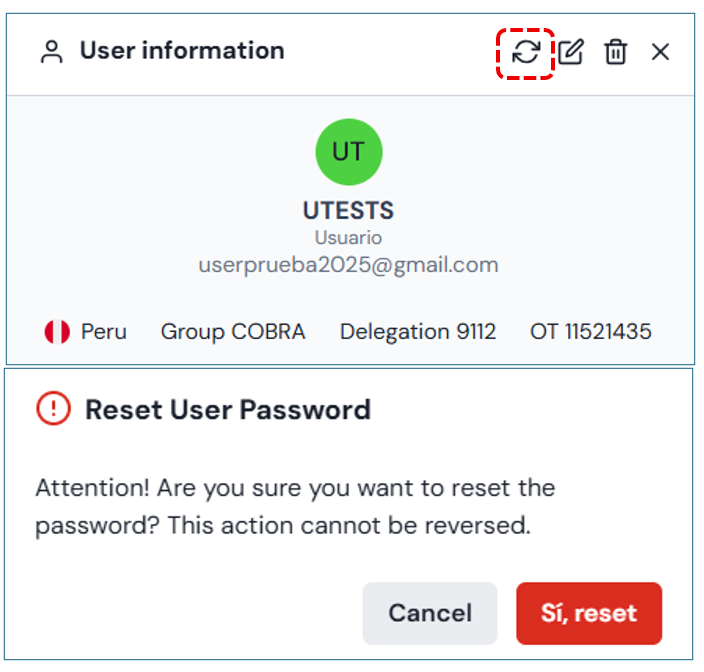
Once confirmed, the system will send a link to the user’s email to reset the password. Additionally, a message will appear at the bottom of the window indicating that the process was successfully completed.
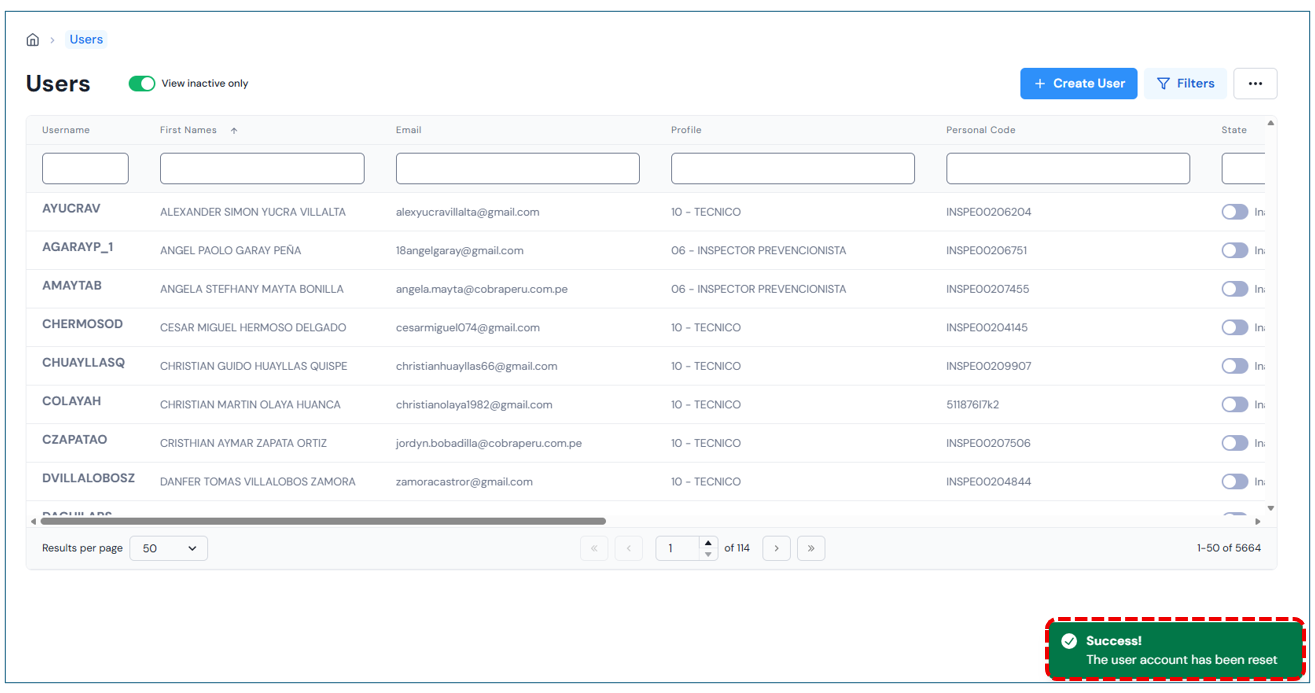
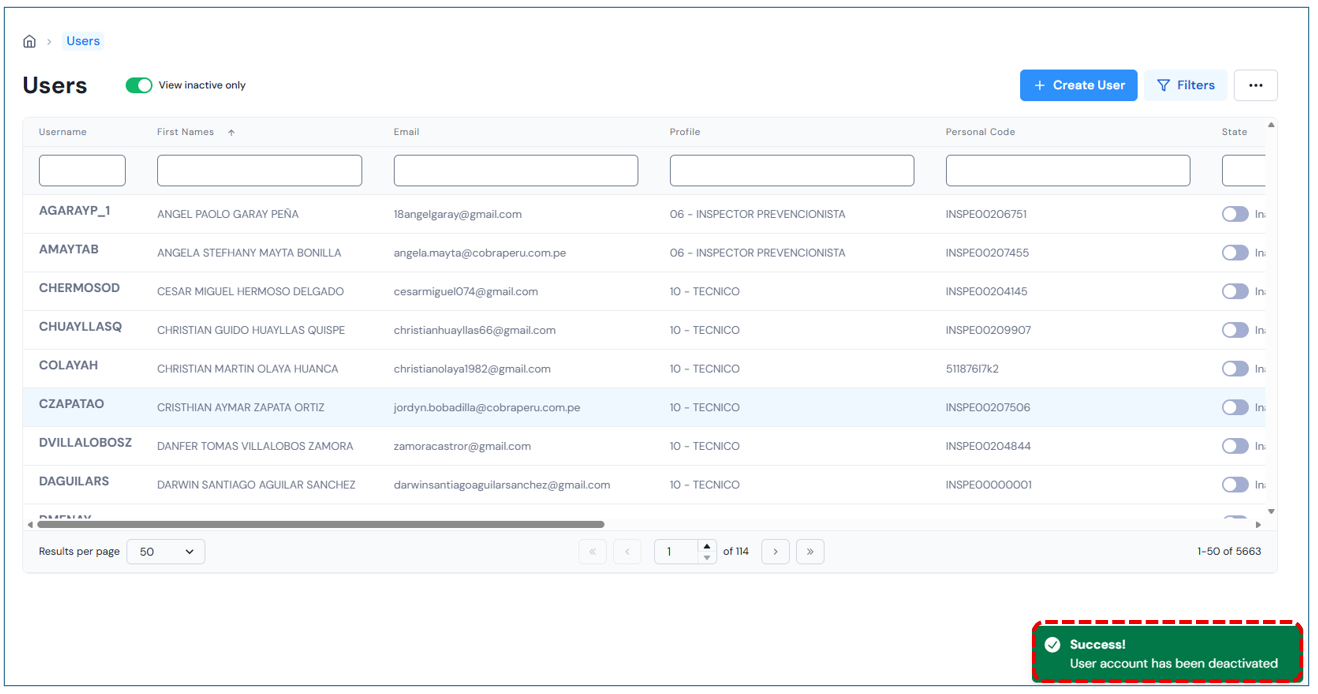
Delete User
If the user wishes to delete a record and has the appropriate permissions, click the “Delete”button. The system will then display a message requesting confirmation of the action.
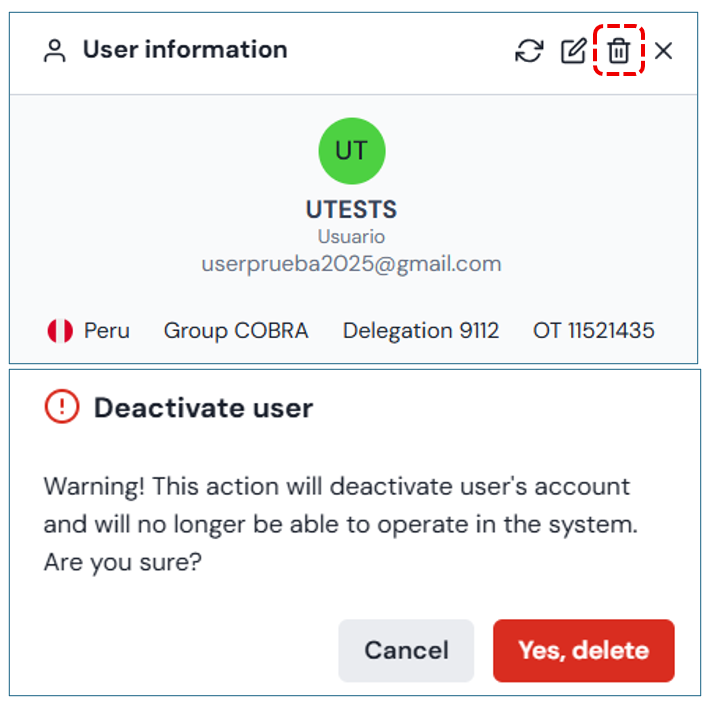
A confirmation will appear indicating that the user has been deactivated.